Showing posts with label mesh weaving. Show all posts

Saturday, August 4, 2018

Weaving Plaid According to the Instructions

I go to online sales places every so often and look for Bucilla kits that I don't already have so I can check out the patterns.  The yarn goes into my stash and I make any pattern I darn well want with the mesh.

The post that is the most viewed is the one where I completely botched the plaid pattern. Well, I finally found out how the manufacturer planned for it to be woven correctly.

First you weave the length of the mesh as usual. You'll include all the stripes in the colors you imagine - all as usual.


Here is part of the photo from the kit I bought. Honestly, you can get as fancy as you wish. It won't be any harder or easier one way or the other.

Once you have completed the length of the fabric, measure across the afghan. You are going to cut yarn to only 3-4 inches longer than the width. Only cut yarn in the colors you want the stripes to be. You don't have to cut anything in the main background color.

You will weave across the fabric under and over the lengthwise yarn. Do not weave into the mesh at all.


To finish the edges, the instructions say that you will weave in the ends on the back side in such a way that they don't show through to the front.

Wash this afghan carefully and don't put it in the dryer. Lay it flat to dry.

I hope this helps. I plan to work on a shawl with this kind of pattern soon. I'll post pictures when I do.

Thanks for visiting with me,

Kathi


Wednesday, August 1, 2018

Long Stitches

My mother-in-law asked me to make another afghan just like the last one I wove. Sigh! Needless to say, I won't bore you by going through the same stuff all over again.

I'm going to ask you to consider how a long stitch might spice up your work. I don't recommend giving this kind of afghan to a person with pets or young children whose fingers will get caught up in the work. (Although you just have to smooth the fabric to make it right again.)

Your long stitches can go any direction, just like the regular weave. Check these out.


Daisies


Long stitches - 2 or 3 holes


Herringbone decoration

I can't give you the whole pattern as I'm not sure what the copyright issues might be, But I wanted to give you something to spark your imagination.

Thanks for visiting with me.

Kathi


Tuesday, July 10, 2018

Finally Finished with This One


Crocheting goes much faster for me than mesh weaving. However, this afghan will be a gift for someone in Florida and I didn't want a heavy material. 

I really like working up a mesh woven afghan or shawl when it is for someone in a warm place or for use in summer weather.

Thank you for visiting with me,

Kathi

Tying Knots


When you are finishing the fringe, please use an overhand knot - or whatever the knot shown above is called. You can hold the left side and slide the knot into any position you want. I knotted three strands together in each knot.

I once tried tying off the fringe (in my young and foolish days) with square knots. The ends stuck out every which way and looked terrible. Please don't repeat my mistake.

Also this time I made the fringe shorter, about 4 inches. I have learned that if you leave long, luxurious fringe (6 inches or better) and then you wash your afghan, you will get the biggest tangled mess you ever saw.

Short fringe is better for blankets that will need cleaning once in a while.

Or you can wrap the whole thing in a towel while it is being washed and dried so the ends don't get a chance to interact with each other. Another option is to roll it up with the fringe in the middle, tie it that way, wash it, and then hang it over a clothes line or over the fence to dry.

Fair warning.

Thanks for visiting with me.

Kathi

Using Several Needles


Once before I tried using several needles at once and got them completely confused. This time I worked with five needles for most of the afghan and was doing well.

Here's the trick: The first needle you use goes closest to the place you are working on. The second needle goes above that by a few strands. The third is always in the third place, etc. 

When you advance to the next section, you take the needle closest to you and use that one first. Then the next needle and so on until you reach the opposite end. 

As long as you figure out a system that works for you every time, you can use as many needles as you are comfortable with. 

Five needles gave me about half an inch after each pass. Ten needles gave me just over one inch at a time. It also took longer. I spent about 25 minutes working ten needles from one end to the other. But it made the empty mesh so much smaller each time and I didn't have to shove the material back and forth as often.

Choose whatever works best for you. If you are happy working one strand at a time, God bless you. If you like to see more progress at once, try several needles. Set up a working pattern and you should be easily able to make a go of it.

Thanks for visiting with me,

Kathi

Sunday, June 17, 2018

Selvage Edge


I noticed that three sides of this fabric have cut edges and one side has a selvage edge. This would make an unsightly border and can't be easily woven through.

My first step with this fabric will be to trim this edge off, being very careful to cut in the first rows of spaces - a straight edge.

Then I will fold all four edges and baste a different color of yarn to hold the edges in place until I can weave them together.

Thanks for visiting with me.

Kathi

Cutting the Yarn

I got a piece of mesh the right size for the project I have in mind. I laid it out and LOOSELY laid a length of yarn along its length, leaving several inches at each end for the length that will be taken up in the weaving and for fringing.


Next, I looked for something to wrap the yarn around that would be about the length I'd just measured against the fabric.


Too short


Too long

Even though three card table legs were more length than I needed, it was to closest thing I could find to wrap the yarn. 

Yes, you can cut a few lengths at a time to the exact length you want. That's not to my taste. I would prefer to trim some extra yarn at the end of the project and have a bunch of strands handy to weave. I always cut a large number at first and then count the number I will need when I get closer to the end of the project.

Here's how I do it.

Tie a slip knot at the beginning of the yarn. Slip it over the first table leg. Wind the yarn around the number of legs that will give you the proper length.


Cut the yarn at the same end as the slip knot.

For me, the easiest way is to hang the cut yarn over a hanger. That will keep the strands loose and even.


Next, I'm going to try to weave a soft wave rather than a chevron pattern. Wish me luck.

Thanks for visiting with me.

Kathi


Sunday, September 29, 2013

Finished Variegated Shawl

 
Here it is, all finished and ready to go.

I'm about to swing into my annual prayer shawl/lap robe marathon which should end on the Sunday nearest Valentine's Day. I turn in as many as I can finish to my church and they give them to our local hospice. Sadly for this project, I'm a much faster crocheter than weaver and I want to make as many shawls and lap robes as possible.

I'm not abandoning my weaving blog. My wrist and elbow will start complaining at some point and I will switch mediums to give my joints a break. After all, we still have to work on diamonds, textures, and plaids.

Thanks for visiting with me.

Kathi Linz

Sunday, September 22, 2013

Only Variegated - Part 2


I'm close to finished with the variegated prayer shawl. This is maybe the easiest kind of patterning you can do. The colors create the design.

You can do a completely random color arrangement if you want to, but I have one trick that organizes the colors just a little.


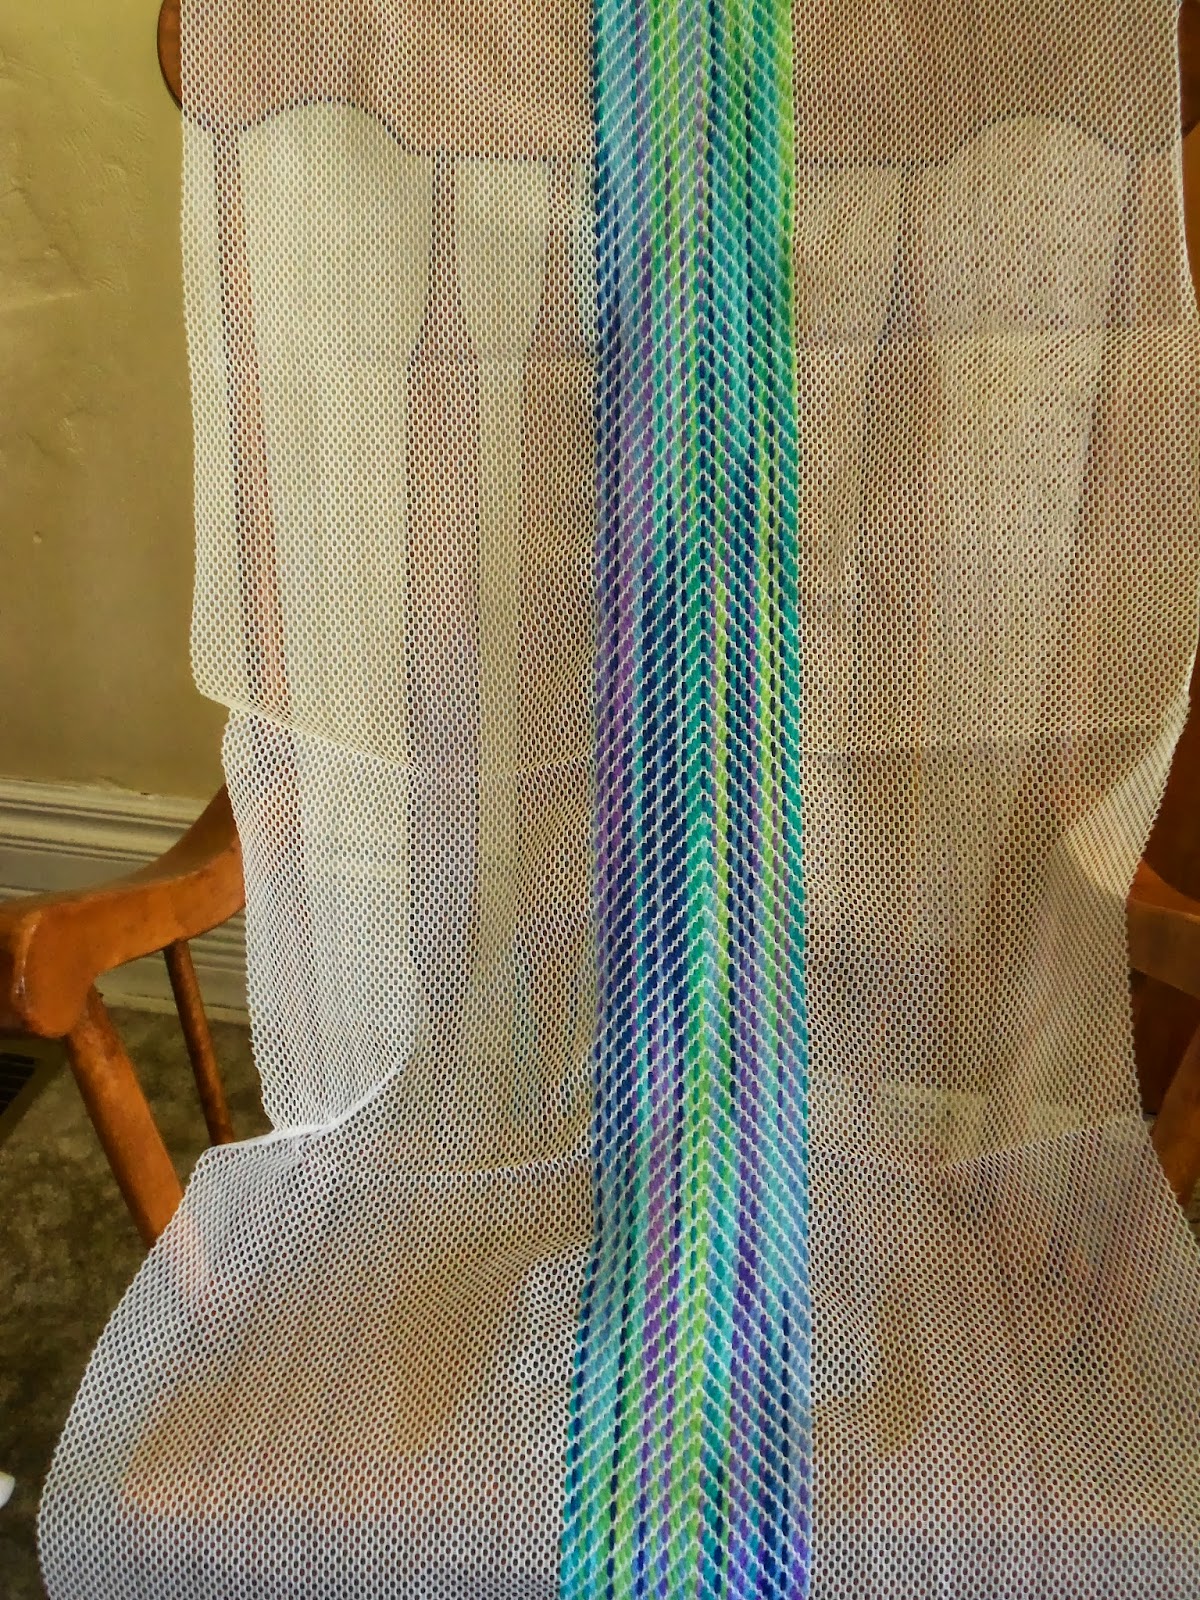
I like to start in the middle with variegated yarn. Then I cut a number of strands. You'll notice that one side of the yarn is mostly greens and turquoises. The other side is mostly purples and blues. I weave the strand on whichever side the end most closely matches.

The colors on the strands don't match exactly along the way, but you end up with pools of color that blend into each other. To me, that makes a more pleasant design.

That's my only hint for working with variegated yarn.

Thanks for visiting with me,

Kathi Linz

Friday, September 20, 2013

Nothing But Variegated


Here's where I am in a prayer shawl using nothing but variegated yarn. The visible mesh is going to be one big chevron - ascending on the left side and descending on the right side.

I'll post it again when I get to the end of this project.

Thanks for visiting with me.

Kathi Linz

Wednesday, September 18, 2013

Woven Granny Squares Complete

 
Finished!  And it doesn't look as washed out in person as it does in this photo.


I was hoping to use up some of my odd bits of yarn, but I hardly touched my stash for this project. The good thing about mesh weaving is that it takes a good deal less yarn than other types of yarn crafts. Or maybe it's the bad thing since I have S.A.B.L.E. - Stash Above and Beyond Life Expectancy.
 
I want to do a prayer shawl completely in variegated yarn to show you how that comes out. I also have a certain color of yarn coming in the mail so I can work up a baby blanket for a friend's great-granddaughter soon to be arriving.
 
But I also have something challenging to figure out. I was looking at bargello yesterday. I like the pomegranate pattern.


However, I don't know how it would translate to mesh weaving.  Look at the canvas you would ordinarily use to do a bargello pattern. The lines cross each other forming perfect squares.


Mesh has rows where the holes are offset.


My best guess for reconstructing bargello on utility mesh would be that you'd need to use a shorter yarn needle and work through the middle of some of the "slubs" - the woven stuff between the holes.

If I were to use a bargello-type pattern on utility mesh, I think I would do a couple of rows of the bargello pattern as an accent row separated by plain weaving.

I'll think about it while I first do the other projects I mentioned.  Hmmm...

Thanks for visiting with me,

Kathi Linz
 

Tuesday, September 17, 2013

Joining Two Pieces of Mesh

Let's say that you've done a few projects and you have some end pieces left over. You don't want to throw them away, but they just aren't big enough to do you much good.

Well, you can make placemats, coasters, or something smaller.


Or you can join two or more pieces to make a larger canvas.

Overlap the edges. You don't have to trim them if you don't want to, but make sure that you start with the narrow part and work to the part with the larger overlap. Be careful to match the holes in the rows. Edges sometimes get stretched out and you can easily miss your row.


You may want to plan to work a side-to-side pattern for this or else baste the overlap and remove it some at a time as you work over that section.

Thanks for visiting with me,

Kathi Linz


Sunday, September 15, 2013

How Many Rows?

Back in the day, a couple of companies used to have specific patterns for exactly how many rows to do of each color and how long each strand of yarn should be cut. The way they could effectively do that was because they sold everything as a kit with a given length of mesh and a specific amount of yarn.

I can't tell you everything about working your pattern because I'm not selling you a kit. You get to choose how large a piece you want to make. You get to choose the color, the length of fringe, and how you want to make the best use of the information I'm sharing with you.

Some people will be frustrated not having a specific pattern. I hope you can make something you enjoy from your own imagination. If you give it a shot and you don't like some part of it, it's pretty easy to pull out that section and redo it a different way.

Thanks for visiting with me,

Kathi Linz

Saturday, September 14, 2013

Progress on Squares

These beautiful days have called me outdoors, but I am making progress on the squares blanket.


It's hard to get the tension just right on this pattern. I am having fun with it. I like working on any square I choose. I like only having to do a little weaving to see a whole section filled.

I can't cut a piece of yarn long enough to fill a whole square. It takes more than one piece of yarn to complete one color. If I work one direction with the first piece and in another direction with the next piece of yarn, the visible mesh starts to look like an optical illusion. If I make sure all of the yarn works in a continuous pattern, a corner-to-corner diagonal pattern shows up. You can play with this one to see how interesting you want to make it or to make everything come out even.

I'll post more as I get farther along.

Thanks for visiting with me,

Kathi Linz
 

Thursday, September 12, 2013

Working on the Granny Squares

Once I worked the dark green borders, I started filling in the squares.


I cut a long piece of yarn and kept going around in a spiral.

This is the way to weave in a yarn end.


Run the yarn under a few strands and then turn it around and run it in another direction to lock it in place.


Thanks for visiting with me,

Kathi Linz
 

Squares - The Math

I'm an inveterate crocheter turned weaver, so you'll have to forgive me if I turn some of my favorite crochet patterns into weaving.

This is going to be my rendition of a woven granny square lap robe.

The math got all weird when I had to factor in the difference in the width of the rows up and down as opposed to across. The up and down rows are a bit narrower than the ones going across. That means you can't count the same number of rows in both directions if you want to make a square.


I made my up and down borders 7 rows wide. When I started going across, I realized that 7 rows would be out of proportion with the up and down rows. It turned out that the right numbers would be 7 rows worked up and down and 5 rows worked across.

That meant I also had to refigure the numbers inside of the squares. I started with a plan for 7x5 squares in the lap robe - with 46 rows in each square in each direction. I got out a ruler and counted both ways. Now my numbers are 46 by 39.  So the number of squares actually increased by a whole row of 7. Now I'll be working 42 squares instead of 35.

I don't know if you want to call this one a "plaid" but the pattern does cross itself.


I was hoping that all of the visible mesh would be covered once I went in both directions. It doesn't seem to happen that way. When I next work a plaid, I will have to take that into account.

Thanks for visiting with me,

Kathi Linz

Wednesday, September 11, 2013

Patterns for the Length of the Mesh

Here are some of the basic patterns for weaving the length of the mesh.


These four are made by choosing to weaving up or down in the first hole of the row and then weaving up and down in each hole of the row going up.

I will be writing these patterns working from right to left.


The red downward diagonal (working from right to left) is made like this:
 
Work down in the first hole of the first row.
Work up in the first hole of the second row.
Work up in the first hole of the third row.
Work down in the first hole of the fourth row.
Work down in the first hole of the fifth row.
 
Repeat 2 ups and 2 downs to form the pattern.
 
The green chevron (working from right to left) is made like this:
 

Work down in the first hole of the first row.
Work down in the first hole of the second row.
Work up in the first hole of the third row.
Work up in the first hole of the fourth row.
Work up in the first hole of the fifth row.
Work down in the first hole of the sixth row.
Work down in the first hole of the seventh row.
Work down in the first hole of the eighth row.
Work up in the first hole of the ninth row.
Work up in the first hole of the tenth row.
Work up in the first hole of the eleventh row.
Work down in the first hole of the twelfth row.
 
Alternate 3 ups and 3 downs to form the pattern.


The red upward diagonal  (working from right to left) is made like this:
 

Work down in the first hole of the first row.
Work down in the first hole of the second row.
Work up in the first hole of the third row.
Work up in the first hole of the fourth row.
Work down in the first hole of the fifth row.
Work down in the first hole of the sixth row.
 
Repeat 2 downs and 2 ups to form this pattern.
 
The blue zig-zag (working from either direction) is made like this:
 
Go down in the first hole of every row.
 
These are the basics. There are a few special patterns that we can play with, but most of the old patterns and probably the ones you are likely to use the most will have one or a combination of these basics.
 
Thanks for visiting with me.
 
Kathi Linz

Patterns Side-to-Side


Weaving side-to-side on the mesh.

These two ways to weave make a stacked brick pattern:

Blue - Go down in first hole of each row.
Red - Go down in the first hole of the first row.
          Go up in the first hole of the next row. Alternate.
It makes no difference in the pattern which one you choose for this pattern.


Close up of stacked bricks - start of rows


Diagonal weaving
Go down in the first hole of each row. Turn the corner at any point you choose, but make sure that the following rows turn the corner at the same point.

My next post will show some weaving patterns using the up-and-down rows.

Thanks for visiting with me,

Kathi Linz


Monday, September 9, 2013

Other Weavers!

I've had a few people ask me for the patterns that I had from old kits. I've emailed them the patterns and recently sent out an email to the same people with news about my mesh weaving blog.

One lovely lady from North Carolina sent me photos of some of the pieces that were finished by their prayer shawl group.

Check out these lovely pieces done by the "Wrapped in Love" Prayer Shawl Ministry of Independence Hill Baptist Church of Huntersville, North Carolina.

My thanks to Dora and her prayer shawl group for allowing me to post these pictures of their gorgeous work.

I'd be happy to hear from anyone who loves to do mesh weaving. Some of you are much better at it than I am. lol

Thanks for visiting with me,

Kathi Linz

Sunday, September 8, 2013

Half Plaid

I finished fixing and weaving the plaid base. I used a traditional overhand knot for the fringe and trimmed it fairly short - at least my idea of short. If perhaps a hospice care person is in a wheel chair, I would want the fringe short enough not to easily get in the wheels.


I wove this lap robe from side to side across the mesh. For every row, I started by going down into the first hole.
 
 
If  you look at the dark rows of the pattern, you will see that the visible mesh makes a small zigzag - almost a straight line across the weave. It's possible to make chevrons going either up and down the mesh or across. In the next couple of days, I'll make some small samples to give you exact directions for ways to show off the visible mesh.
 
Thanks for visiting with me,
 
Kathi Linz