Sunday, September 29, 2013

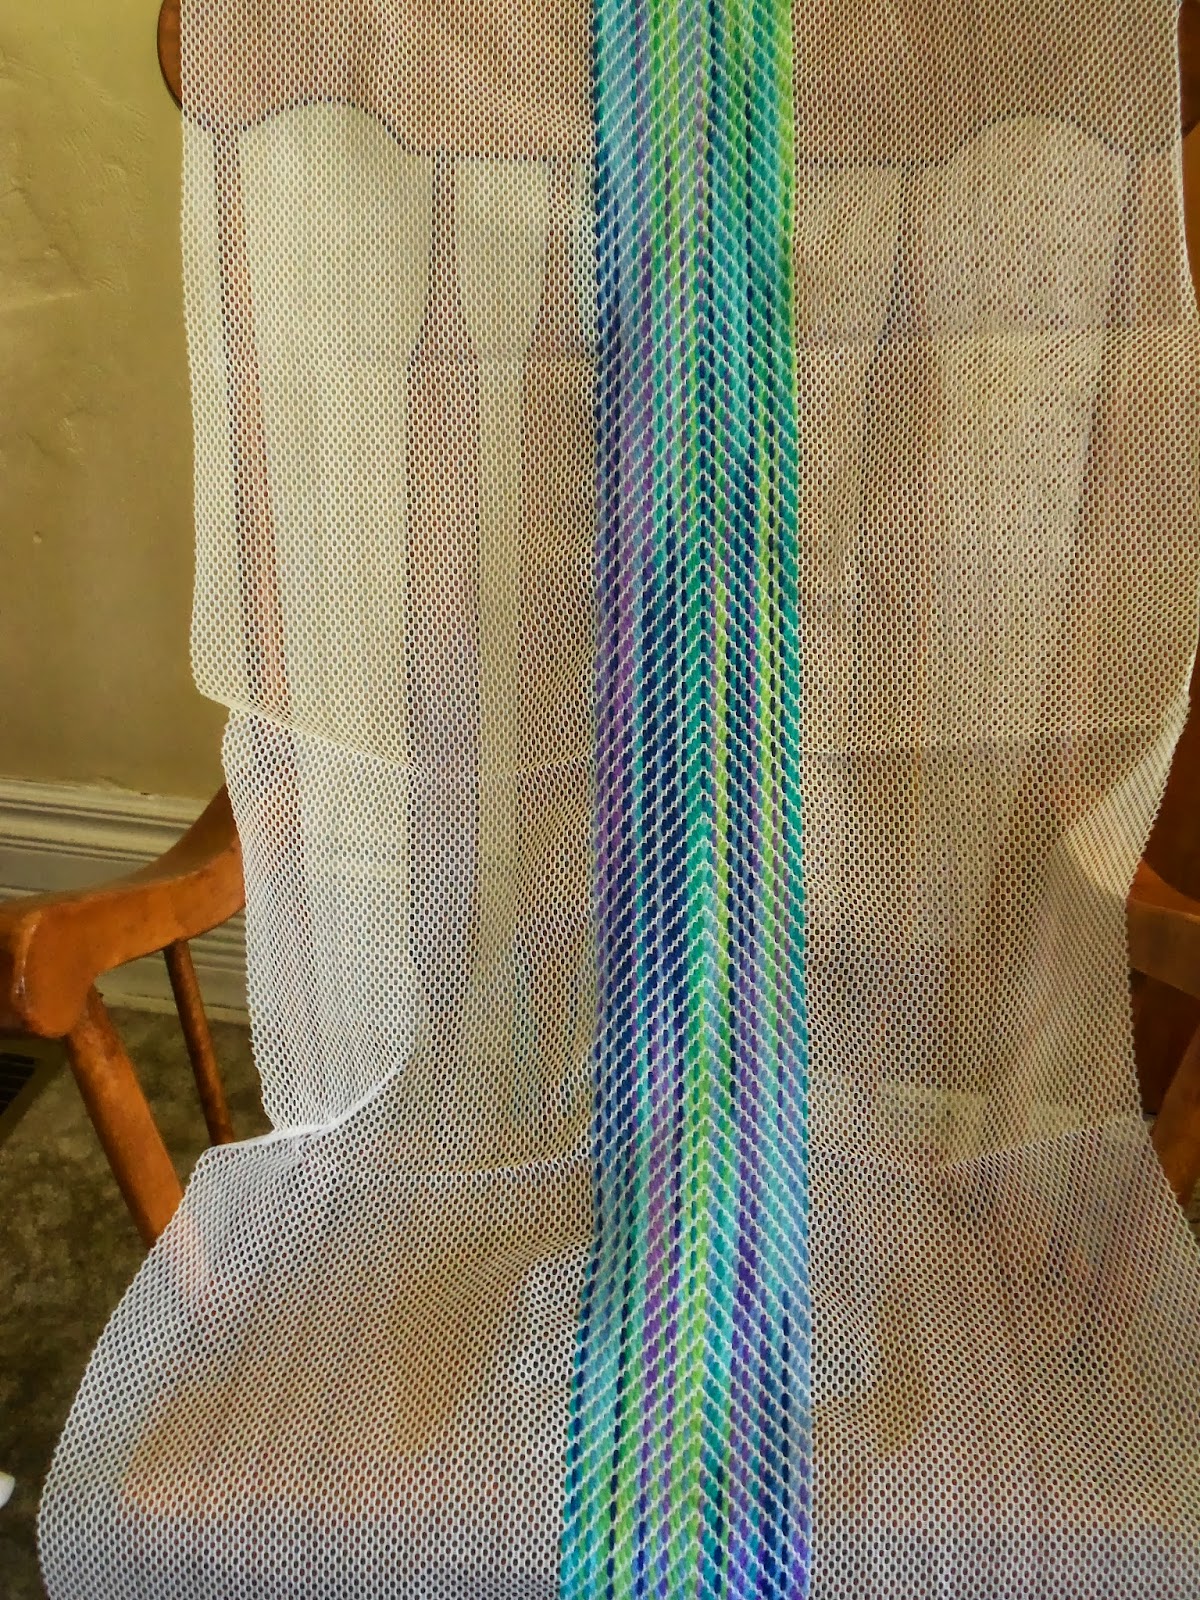
Finished Variegated Shawl

 
Here it is, all finished and ready to go.

I'm about to swing into my annual prayer shawl/lap robe marathon which should end on the Sunday nearest Valentine's Day. I turn in as many as I can finish to my church and they give them to our local hospice. Sadly for this project, I'm a much faster crocheter than weaver and I want to make as many shawls and lap robes as possible.

I'm not abandoning my weaving blog. My wrist and elbow will start complaining at some point and I will switch mediums to give my joints a break. After all, we still have to work on diamonds, textures, and plaids.

Thanks for visiting with me.

Kathi Linz

Sunday, September 22, 2013

Only Variegated - Part 2


I'm close to finished with the variegated prayer shawl. This is maybe the easiest kind of patterning you can do. The colors create the design.

You can do a completely random color arrangement if you want to, but I have one trick that organizes the colors just a little.


I like to start in the middle with variegated yarn. Then I cut a number of strands. You'll notice that one side of the yarn is mostly greens and turquoises. The other side is mostly purples and blues. I weave the strand on whichever side the end most closely matches.

The colors on the strands don't match exactly along the way, but you end up with pools of color that blend into each other. To me, that makes a more pleasant design.

That's my only hint for working with variegated yarn.

Thanks for visiting with me,

Kathi Linz

Friday, September 20, 2013

Nothing But Variegated


Here's where I am in a prayer shawl using nothing but variegated yarn. The visible mesh is going to be one big chevron - ascending on the left side and descending on the right side.

I'll post it again when I get to the end of this project.

Thanks for visiting with me.

Kathi Linz

Wednesday, September 18, 2013

Woven Granny Squares Complete

 
Finished!  And it doesn't look as washed out in person as it does in this photo.


I was hoping to use up some of my odd bits of yarn, but I hardly touched my stash for this project. The good thing about mesh weaving is that it takes a good deal less yarn than other types of yarn crafts. Or maybe it's the bad thing since I have S.A.B.L.E. - Stash Above and Beyond Life Expectancy.
 
I want to do a prayer shawl completely in variegated yarn to show you how that comes out. I also have a certain color of yarn coming in the mail so I can work up a baby blanket for a friend's great-granddaughter soon to be arriving.
 
But I also have something challenging to figure out. I was looking at bargello yesterday. I like the pomegranate pattern.


However, I don't know how it would translate to mesh weaving.  Look at the canvas you would ordinarily use to do a bargello pattern. The lines cross each other forming perfect squares.


Mesh has rows where the holes are offset.


My best guess for reconstructing bargello on utility mesh would be that you'd need to use a shorter yarn needle and work through the middle of some of the "slubs" - the woven stuff between the holes.

If I were to use a bargello-type pattern on utility mesh, I think I would do a couple of rows of the bargello pattern as an accent row separated by plain weaving.

I'll think about it while I first do the other projects I mentioned.  Hmmm...

Thanks for visiting with me,

Kathi Linz
 

Tuesday, September 17, 2013

Joining Two Pieces of Mesh

Let's say that you've done a few projects and you have some end pieces left over. You don't want to throw them away, but they just aren't big enough to do you much good.

Well, you can make placemats, coasters, or something smaller.


Or you can join two or more pieces to make a larger canvas.

Overlap the edges. You don't have to trim them if you don't want to, but make sure that you start with the narrow part and work to the part with the larger overlap. Be careful to match the holes in the rows. Edges sometimes get stretched out and you can easily miss your row.


You may want to plan to work a side-to-side pattern for this or else baste the overlap and remove it some at a time as you work over that section.

Thanks for visiting with me,

Kathi Linz


Sunday, September 15, 2013

How Many Rows?

Back in the day, a couple of companies used to have specific patterns for exactly how many rows to do of each color and how long each strand of yarn should be cut. The way they could effectively do that was because they sold everything as a kit with a given length of mesh and a specific amount of yarn.

I can't tell you everything about working your pattern because I'm not selling you a kit. You get to choose how large a piece you want to make. You get to choose the color, the length of fringe, and how you want to make the best use of the information I'm sharing with you.

Some people will be frustrated not having a specific pattern. I hope you can make something you enjoy from your own imagination. If you give it a shot and you don't like some part of it, it's pretty easy to pull out that section and redo it a different way.

Thanks for visiting with me,

Kathi Linz

Saturday, September 14, 2013

Progress on Squares

These beautiful days have called me outdoors, but I am making progress on the squares blanket.


It's hard to get the tension just right on this pattern. I am having fun with it. I like working on any square I choose. I like only having to do a little weaving to see a whole section filled.

I can't cut a piece of yarn long enough to fill a whole square. It takes more than one piece of yarn to complete one color. If I work one direction with the first piece and in another direction with the next piece of yarn, the visible mesh starts to look like an optical illusion. If I make sure all of the yarn works in a continuous pattern, a corner-to-corner diagonal pattern shows up. You can play with this one to see how interesting you want to make it or to make everything come out even.

I'll post more as I get farther along.

Thanks for visiting with me,

Kathi Linz